Google SAML sign-in#
Connect Google Workspace as a SAML identity provider for your private BSR instance. Once configured, users sign in to the BSR through Google and the BSR provisions accounts Just-in-Time using the user’s primary email address.
This walkthrough is for a Google Workspace administrator working alongside a BSR administrator with the Admin or Owner role on the BSR organization that owns the instance.
Before you start#
- Complete Pro and Enterprise setup, including DNS, so the instance is reachable.
- Know your private BSR instance’s domain name (for example,
your-bsr-instance.example.com); the examples below use this placeholder. - Have the right BSR role:
AdminorOwneron the organization that owns the instance. - Have administrative access to your Google Workspace organization.
Add the SAML app in Google Admin#
- Sign in to the Google Admin console.
-
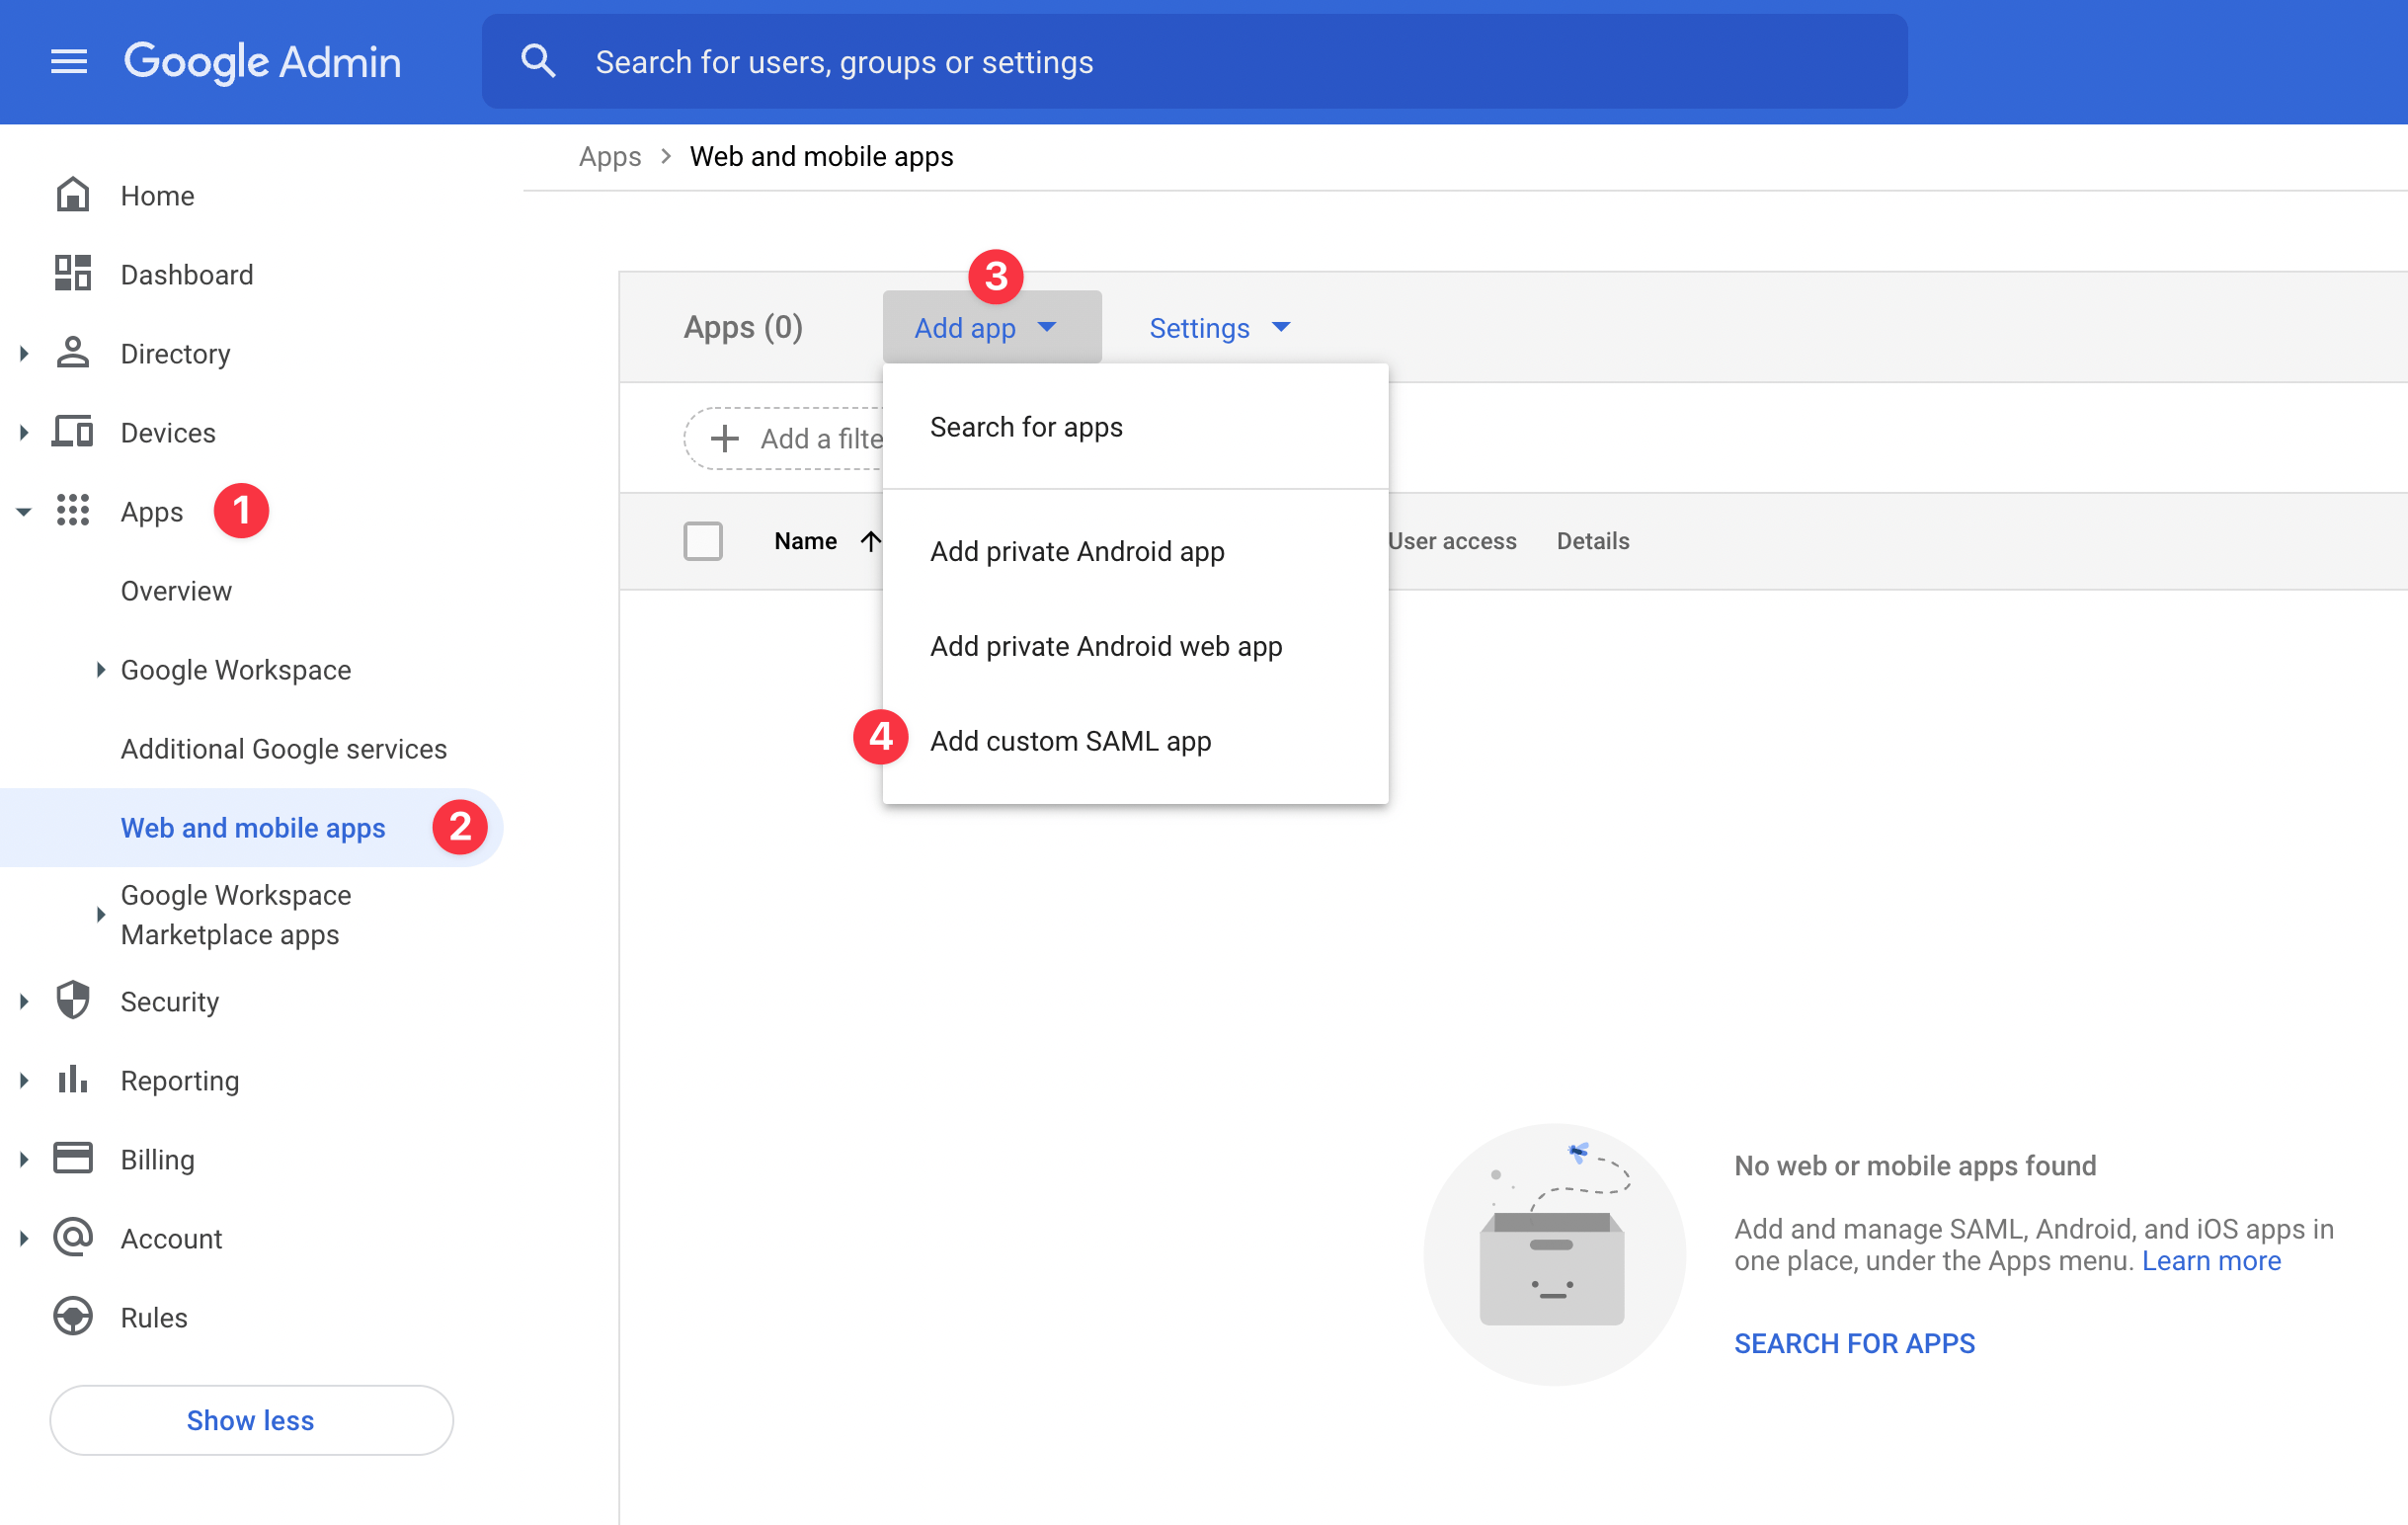
Navigate to Apps > Web and mobile apps > Add app > Add custom SAML app.
-
Name the app something like “Buf Schema Registry” or “Buf”; pick a name your users will recognize. Optionally add a description and icon.
- Click Continue.
Download the IdP metadata#
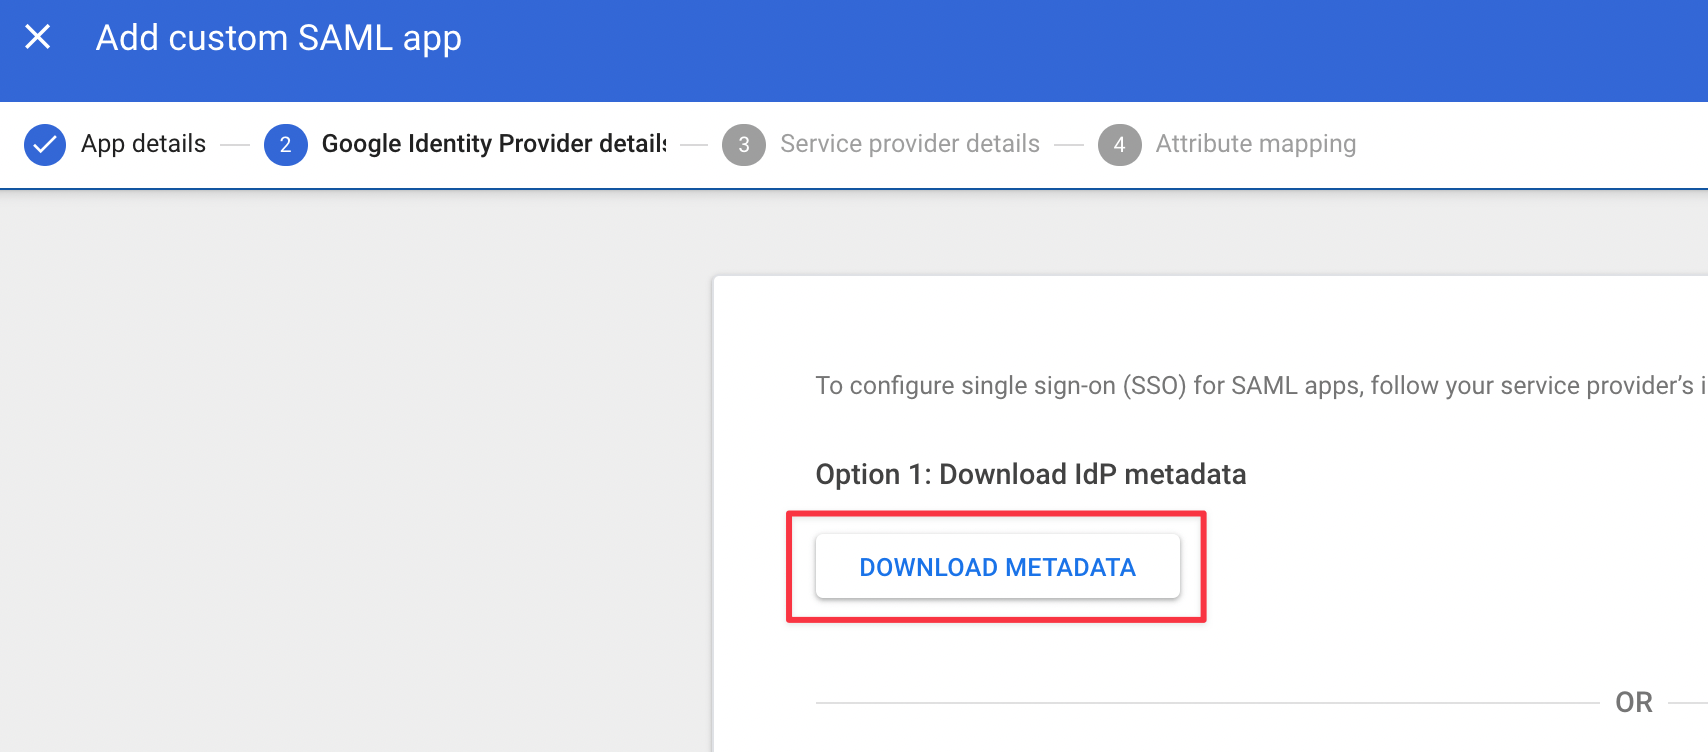
- Click DOWNLOAD METADATA.
Google saves a file (usually named
GoogleIDPMetadata.xml) that the BSR will need later. -
Click Continue.
Configure service provider details#
-
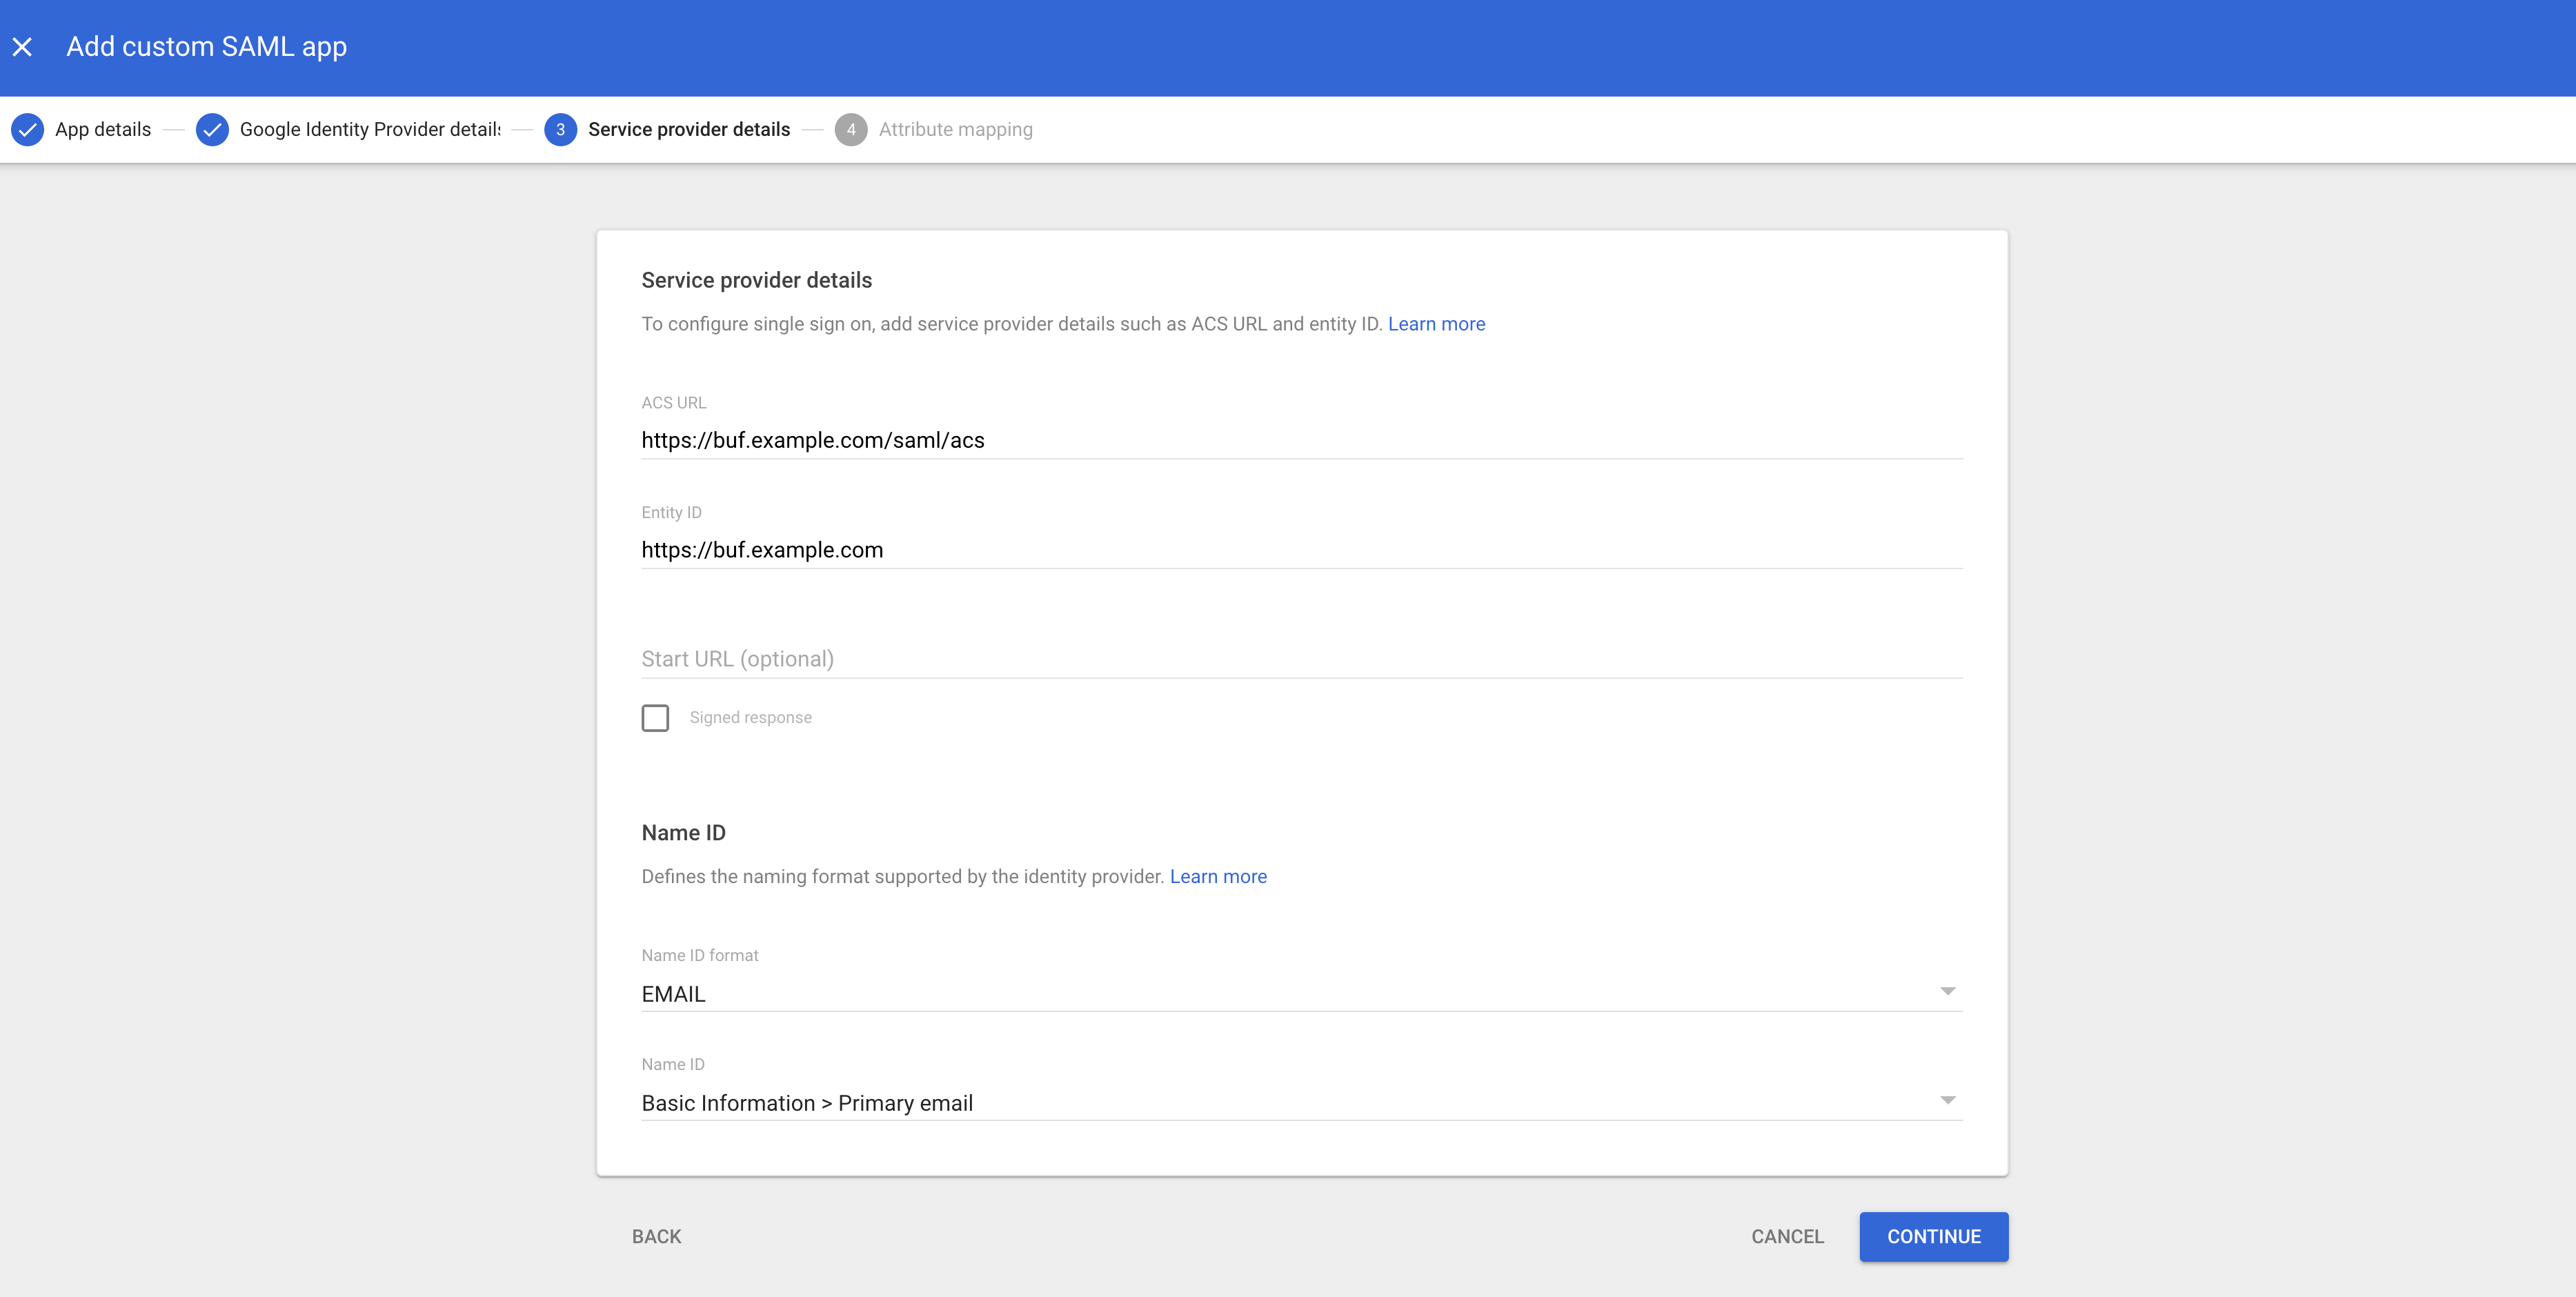
On the Service provider details screen, enter:
- ACS URL:
https://your-bsr-instance.example.com/saml/acs - Entity ID:
https://your-bsr-instance.example.com - Name ID format:
EMAIL - Name ID:
Basic Information > Primary email
Watch the trailing slash
The Entity ID field auto-appends a trailing slash as you type. Remove it before saving; the BSR validates the Entity ID against the URL above without a trailing slash.
The BSR provisions users Just-in-Time from this Name ID, so getting it right is the difference between linking to an existing BSR account and silently creating a new one.
- ACS URL:
-
Click Continue.
- On the Attribute mapping screen, leave the attributes section empty and click Finish.
Enable user access#
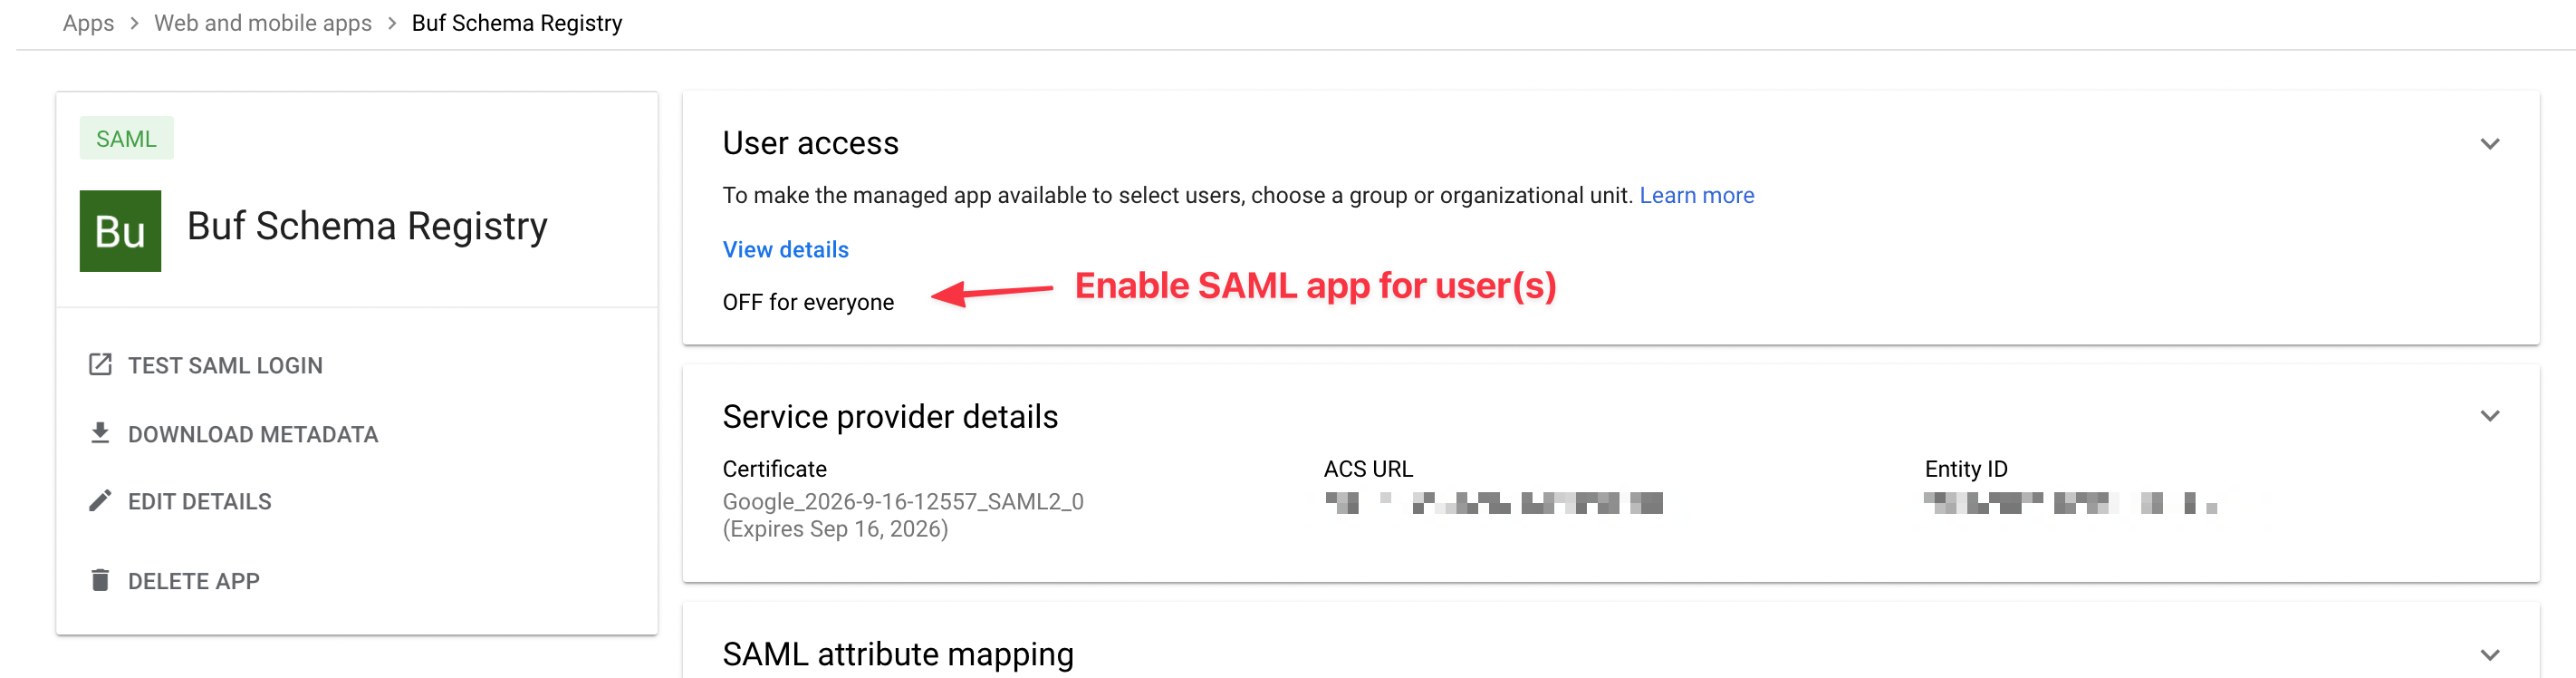
The Google SAML app is OFF for everyone by default. Before the cut-over, enable it for a small test audience and verify sign-in (see Verify sign-in). Once that works, broaden access to the rest of your users.
Update SSO on the BSR instance#
The current UI labels this surface SSO Configuration; the URL still uses pro-settings.
- Open the SSO configuration page at
https://buf.build/your-organization/pro-settings, whereyour-organizationis the BSR organization that owns the instance. The page is hosted onbuf.build, not on your private BSR hostname. - From the SSO Provider dropdown, choose SAML.
- Click Use IdP raw metadata instead.
-
Paste the contents of
GoogleIDPMetadata.xmlinto the IdP Raw Metadata text box.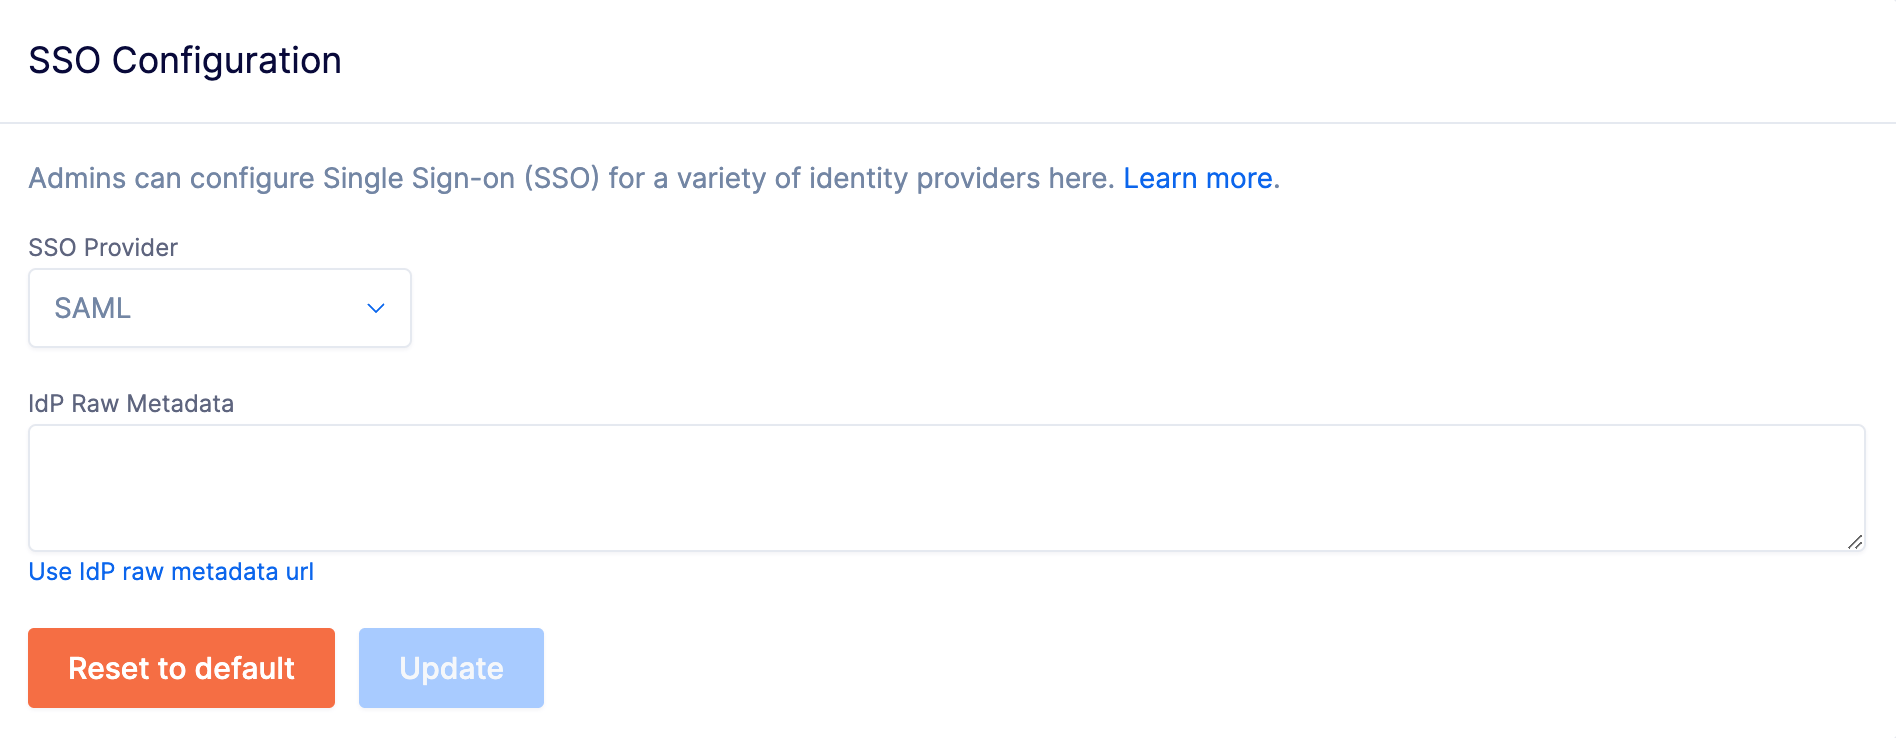
-
Click Update.
Verify sign-in#
In an incognito window, open https://your-bsr-instance.example.com and follow the sign-in flow.
The browser should redirect to Google and, after authentication, land back on the BSR signed in as the SAML identity.
Confirm that the existing BSR account is linked (account history and permissions are intact) rather than a new account being provisioned.
Next steps#
- User lifecycle: how the BSR provisions, promotes, and deactivates users.