GitHub OAuth2 sign-in#
Connect a GitHub OAuth2 application as the identity provider for your private BSR instance. Once configured, users sign in to the BSR through GitHub and the BSR provisions accounts Just-in-Time using the user’s GitHub primary email address.
This walkthrough is for a GitHub administrator working alongside a BSR administrator with the Admin or Owner role on the BSR organization that owns the instance.
The GitHub-side steps follow the Creating a GitHub App guide; the values to use are below.
Before you start#
- Complete Pro and Enterprise setup, including DNS, so the instance is reachable.
- Know your private BSR instance’s domain name (for example,
your-bsr-instance.example.com); the examples below use this placeholder. - Have the right BSR role:
AdminorOwneron the organization that owns the instance. - Have administrative access to your GitHub organization.
Create the SSO GitHub App#
This GitHub App is dedicated to SSO and is separate from any other Buf GitHub App you may have for CI/CD integration. Buf recommends creating the app under your GitHub organization rather than a personal account.
- Sign in to GitHub and open
https://github.com/organizations/your-github-org/settings/apps. - Click New GitHub App.
Configure the GitHub App#
Set the fields below in the order GitHub presents them. Leave any fields not listed at their defaults.
- GitHub App name: a name your users will recognize, like “Buf Schema Registry”.
- Homepage URL:
https://your-bsr-instance.example.com. - Callback URL:
https://your-bsr-instance.example.com/oauth2/callback. - Expire user authorization tokens: enabled. The BSR’s session refresh depends on the GitHub refresh token; leaving this off breaks long-lived sessions.
- Under Webhook, leave Active unchecked.
- Under User permissions, set Email addresses to Read-only. Leave every other permission unset; the BSR only needs to read the signed-in user’s primary email.
Generate the client secret#
- Click Create GitHub App to save the application.
-
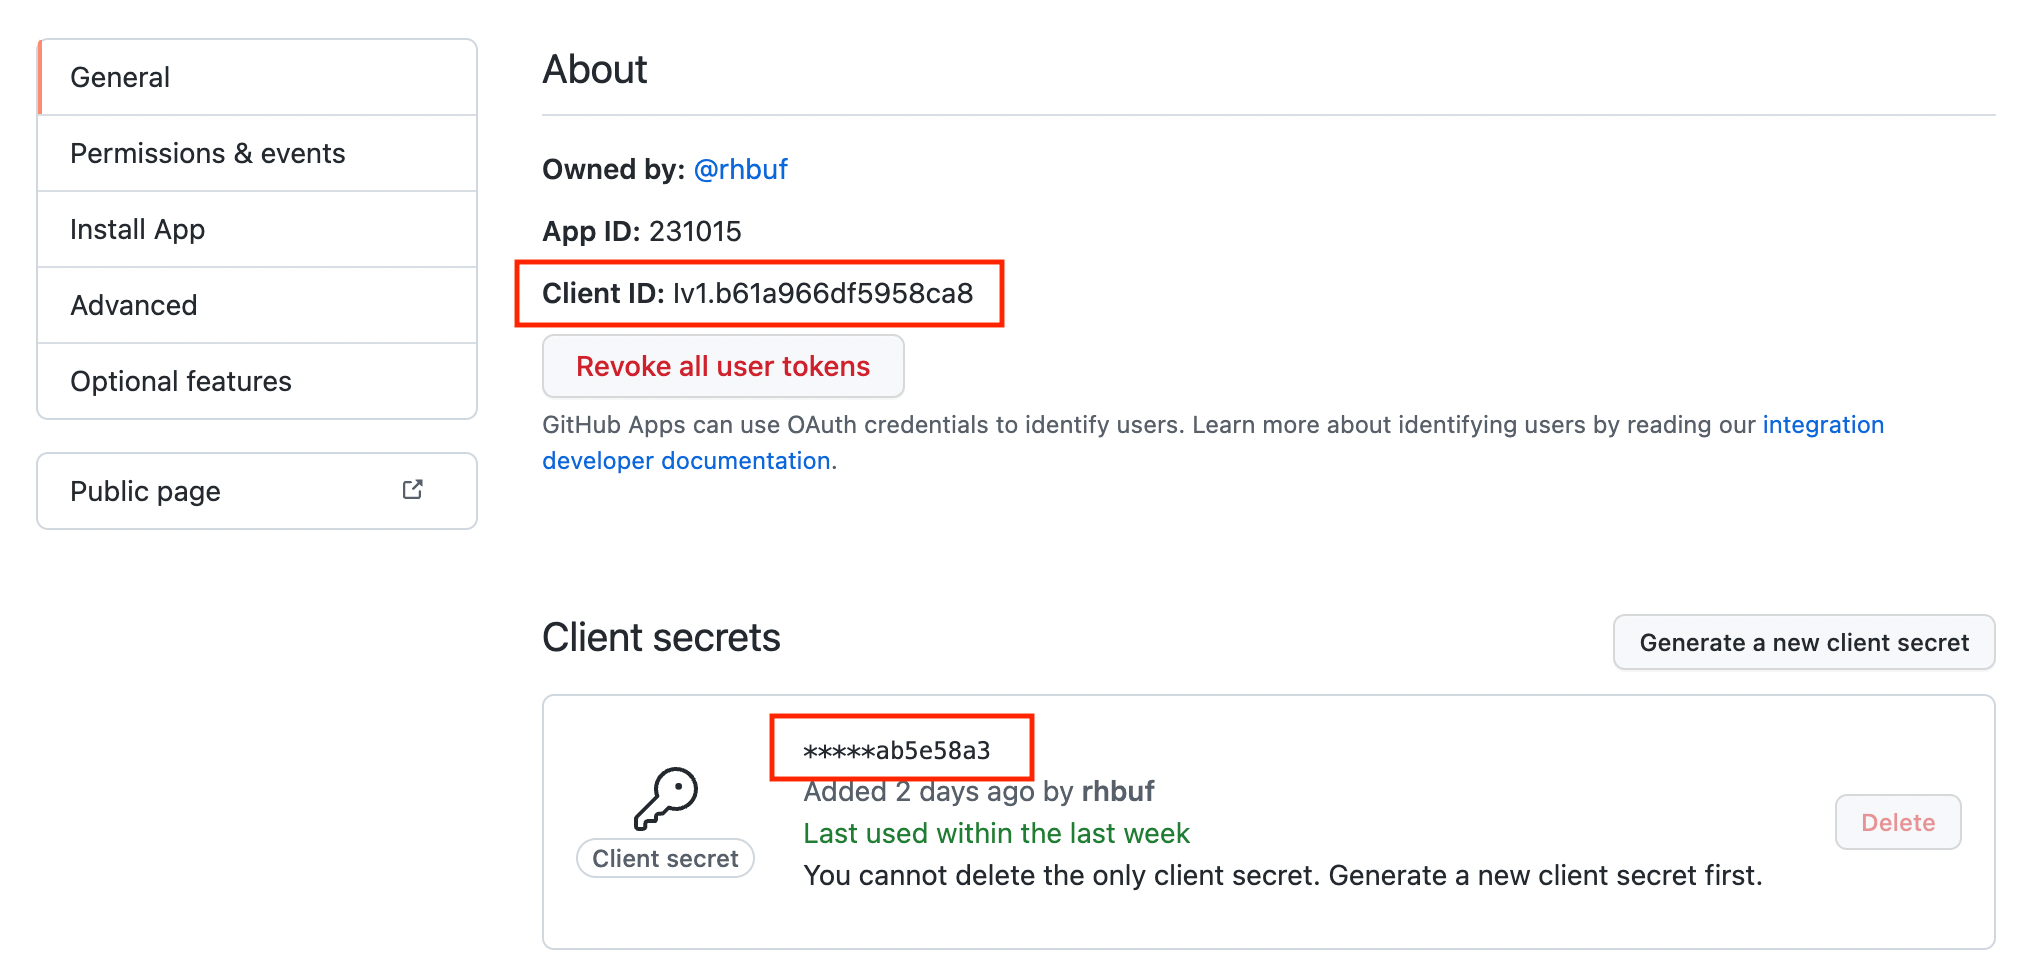
From the new app’s settings, click Generate a new client secret.
-
Copy the Client ID and Client secret for the next section.
Update SSO on the BSR instance#
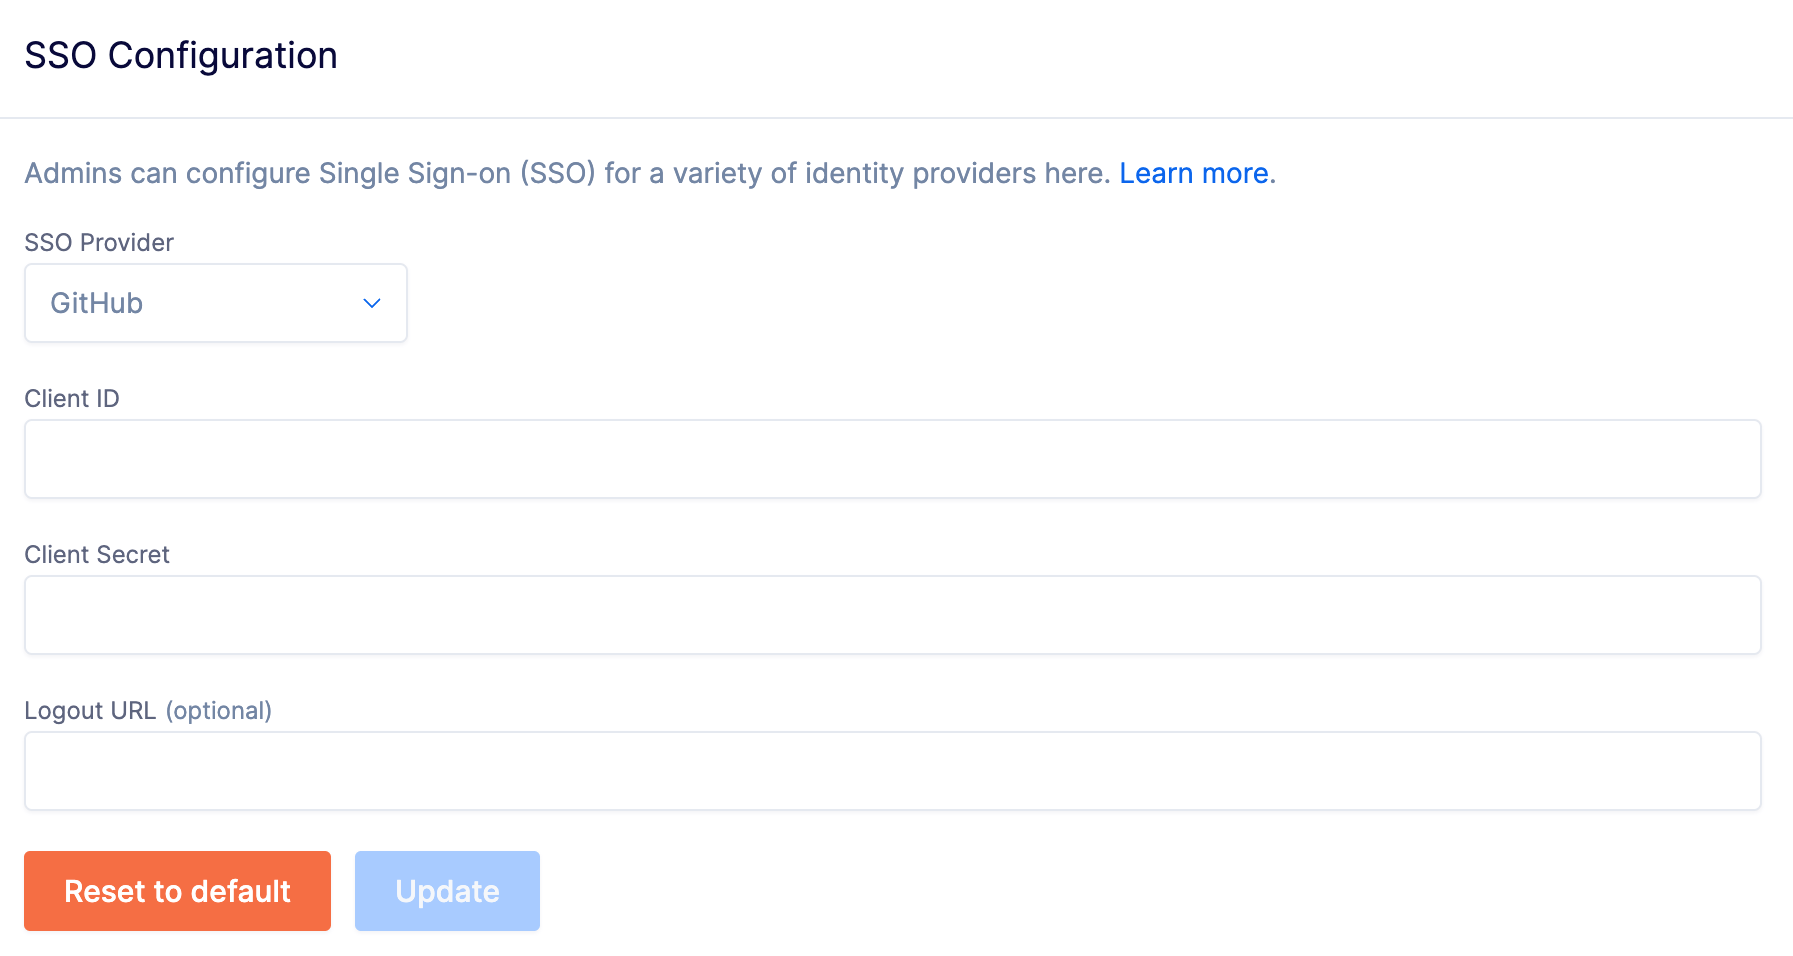
- Open the SSO configuration page at
https://buf.build/your-organization/pro-settings, whereyour-organizationis the BSR organization that owns the instance. The page is hosted onbuf.build, not on your private BSR hostname. - From the SSO Provider dropdown, choose GitHub.
- Enter the Client ID and Client secret copied above.
-
Click Update.
Verify sign-in#
In an incognito window, open https://your-bsr-instance.example.com and follow the sign-in flow.
The browser should redirect to GitHub and, after authentication, land back on the BSR signed in with the GitHub identity.
Confirm that the existing BSR account is linked (account history and permissions are intact) rather than a new account being provisioned.
The BSR matches by primary GitHub email address only; if the primary email doesn’t match an existing BSR account, sign-in provisions a new one.
Troubleshooting#
I don’t have admin privileges after signing in with GitHub SSO#
Signing in via GitHub SSO provisions a BSR account linked to your GitHub identity by primary email. For admin privileges to apply to that account, your GitHub primary email must match one of the admin email addresses configured on the BSR instance.
After confirming or updating the configured admin email, sign out of the BSR and sign back in to pick up the admin role.
If you’re not sure which address is your primary, check your GitHub email settings. Secondary or backup addresses don’t count for matching.
Next steps#
- User lifecycle: how the BSR provisions, promotes, and deactivates users.