Okta - SAML#
Buf's SSO integration supports the following SAML features:
- Identity Provider (IdP)-initiated SSO
- Service Provider (SP)-initiated SSO
- Just-in-Time (JIT) user provisioning
- SCIM 2.0 user and group provisioning
The steps below must be carried out by an Okta administrator for your organization.
Prerequisites#
- Setup needs to be complete.
You need to know your private BSR instance's domain name (for example,
example.buf.devorbuf.example.com) for the steps below.
Set up application#
- Sign in to your Okta organization.
- Navigate to Applications > Applications and click Create App Integration.
- For Sign-in method, select SAML 2.0 and click Next.
- Under General Settings, give the integration an App name like "Buf Schema Registry" or "Buf". This should be something meaningful to your users.
Configure SAML#
- Set Single sign on URL to
https://buf.example.com/saml/acs. - Set Audience URI (SP Entity ID) to
https://buf.example.com. - For Name ID format and Application username, select
EmailAddressandEmail, respectively.
Buf provisions users Just-in-Time based on the email address—make sure you've configured the Name ID correctly.

We recommend keeping the Okta defaults under Advanced Settings. However, if your organization has additional requirements, such as Single Logout (SLO) or adding Assertion Encryption, contact Support or your Buf representative.
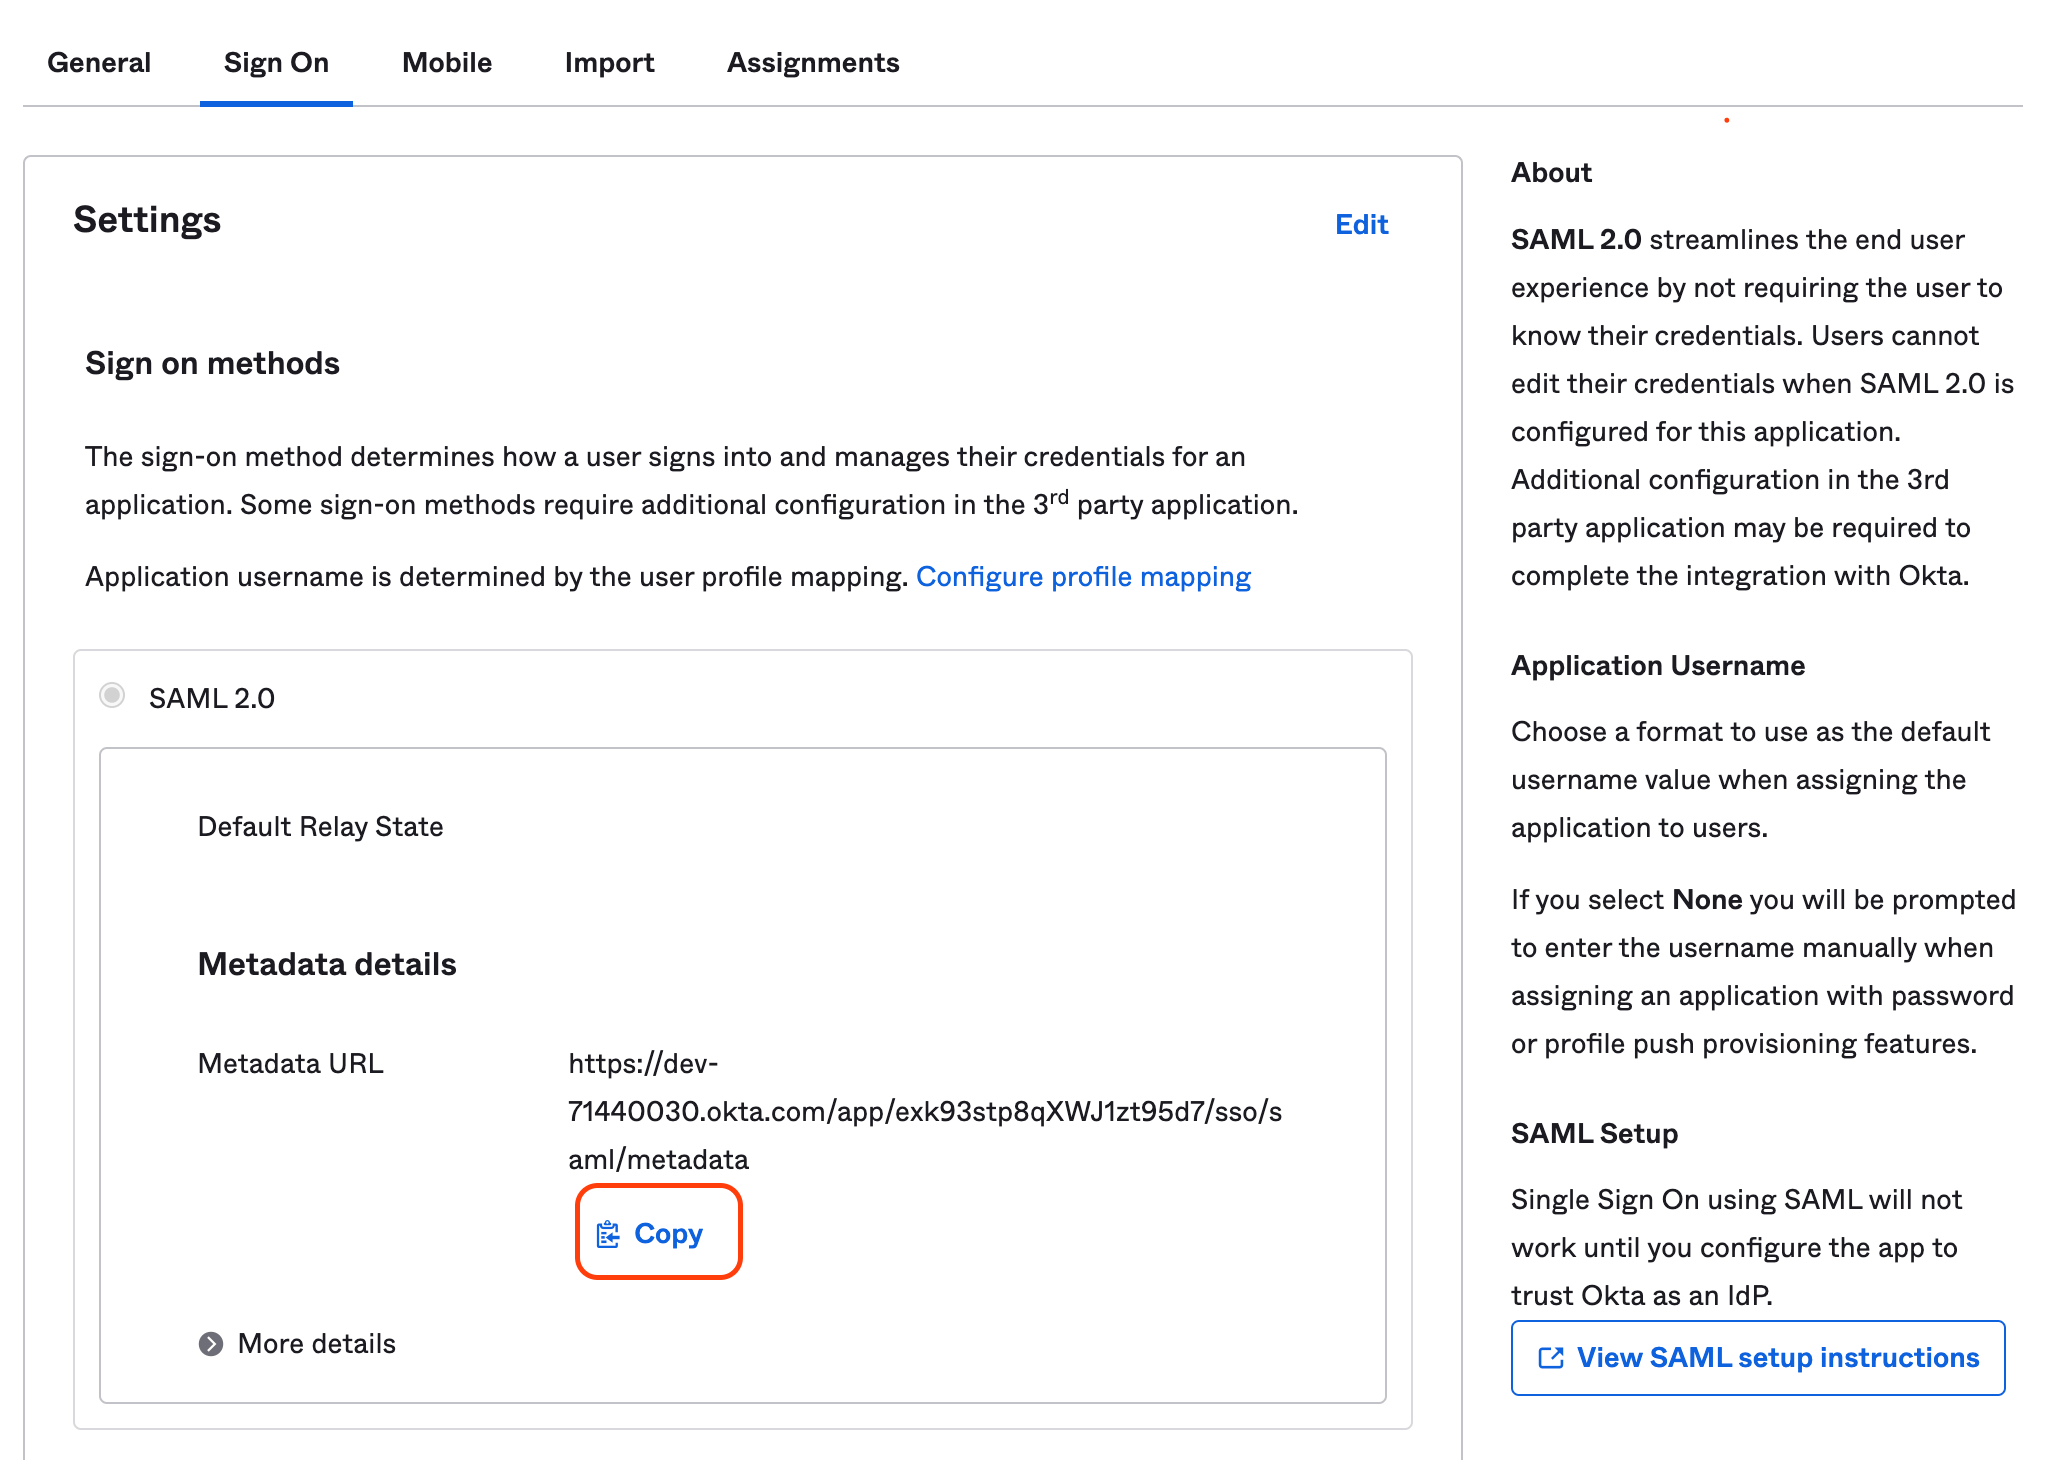
Get metadata URL#
Buf supports fetching dynamic configuration directly from the publicly hosted Okta Metadata URL.
- Navigate to the Buf application.
- Click the Sign On tab and look for Identity Provider Metadata. This is a public URL Okta provides for you to share with your Service Provider.
-
Copy the Metadata URL to use for configuring your BSR instance.
Update SSO configuration#
To set up or update your BSR instance's SSO configuration:
- Go to the SSO Configuration page at
http://<BSR_SERVER>/<ORGANIZATION>/pro-settings. - From the SSO Provider dropdown, choose SAML.
-
Enter the Metadata URL in the IdP Metadata URL text box.
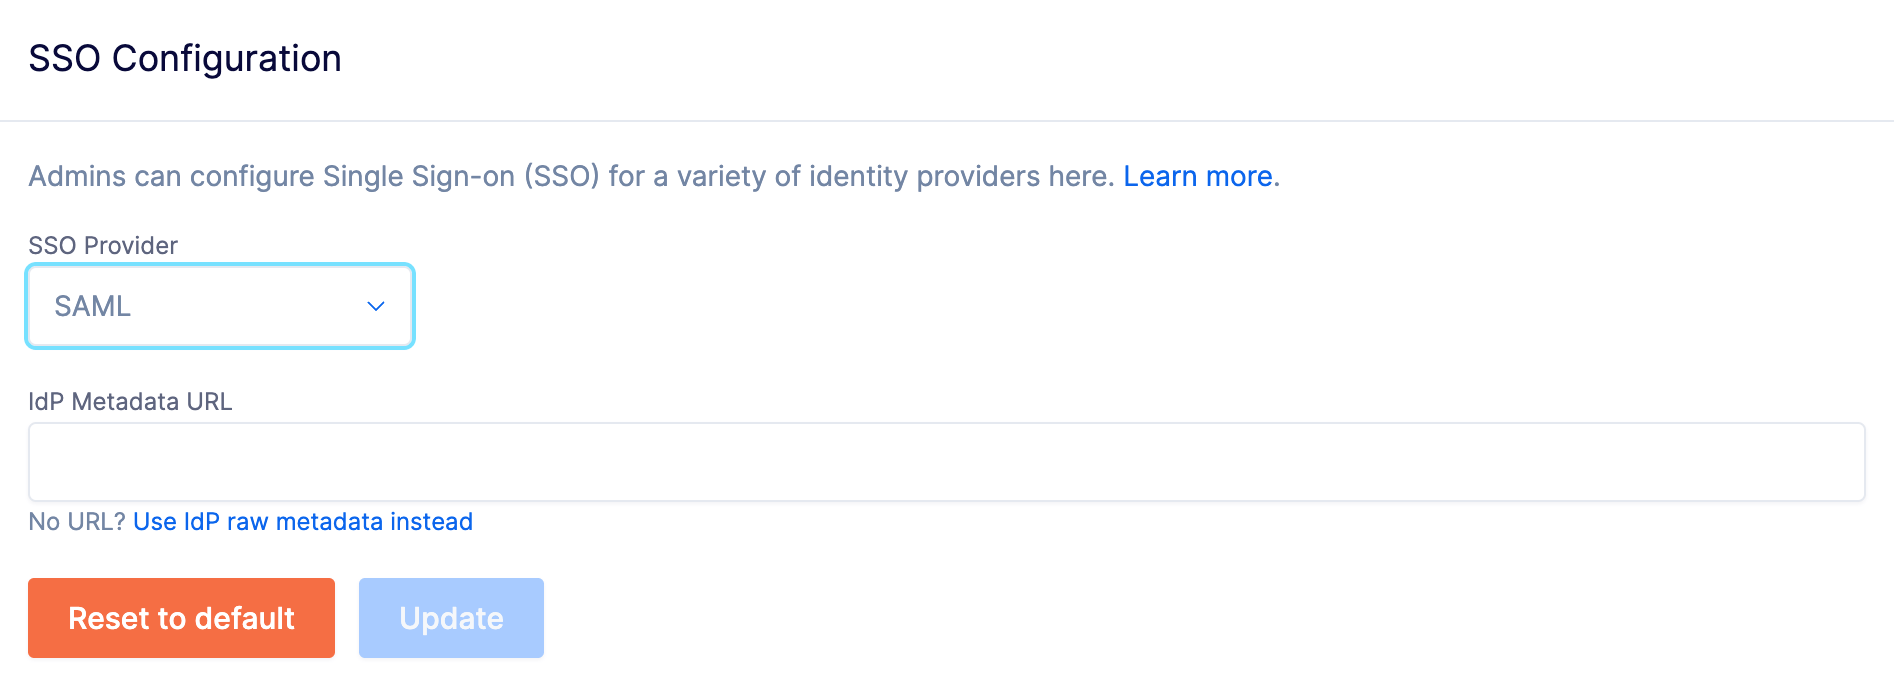
-
Click Update.